学习Springboot的环境
继续用之前装的jdk1.8、IDEA2019.1,然后又安装maven环境,之前用的是IDEA自带的maven工具。一开始选的是maven3.6.3版本,因为加入Springboot依赖导致报红,所以换了3.5.3版本的。maven版本太高了容易出错。
Spring Boot 简介
简化Spring应用开发的一个框架;
整个Spring技术栈的一个大整合;
J2EE开发的一站式解决方案;
Springboot开门程序helloworld
1、配置maven外部环境
IDEA首页-右下角Configure-settings-按下图配置

2、创建程序时选maven后直接创建啥也不选后接着在maven文件目录下conf-settings.xml
<profile>
  <id>jdk-1.8</id>
  <activation>
    <activeByDefault>true</activeByDefault>
    <jdk>1.8</jdk>
  </activation>
  <properties>
    <maven.compiler.source>1.8</maven.compiler.source>
    <maven.compiler.target>1.8</maven.compiler.target>
    <maven.compiler.compilerVersion>1.8</maven.compiler.compilerVersion>
  </properties>
</profile>
另外,settings.xml中的258行的
3、在pom.xml加入以下依赖
 <!-- Inherit defaults from Spring Boot  父项目 -->
<parent>
    <groupId>org.springframework.boot</groupId>
    <artifactId>spring-boot-starter-parent</artifactId>
    <version>1.5.9.RELEASE</version>
</parent>

<!-- Add typical dependencies for a web application 不写版本号自动仲裁 -->
<dependencies>
    <dependency>
        <groupId>org.springframework.boot</groupId>
        <artifactId>spring-boot-starter-web</artifactId>
    </dependency>
</dependencies>


<!-- Package as an executable jar  这个插件,可以将应用打包成一个可执行的jar包-->
<build>
    <plugins>
        <plugin>
            <groupId>org.springframework.boot</groupId>
            <artifactId>spring-boot-maven-plugin</artifactId>
        </plugin>
    </plugins>
</build>
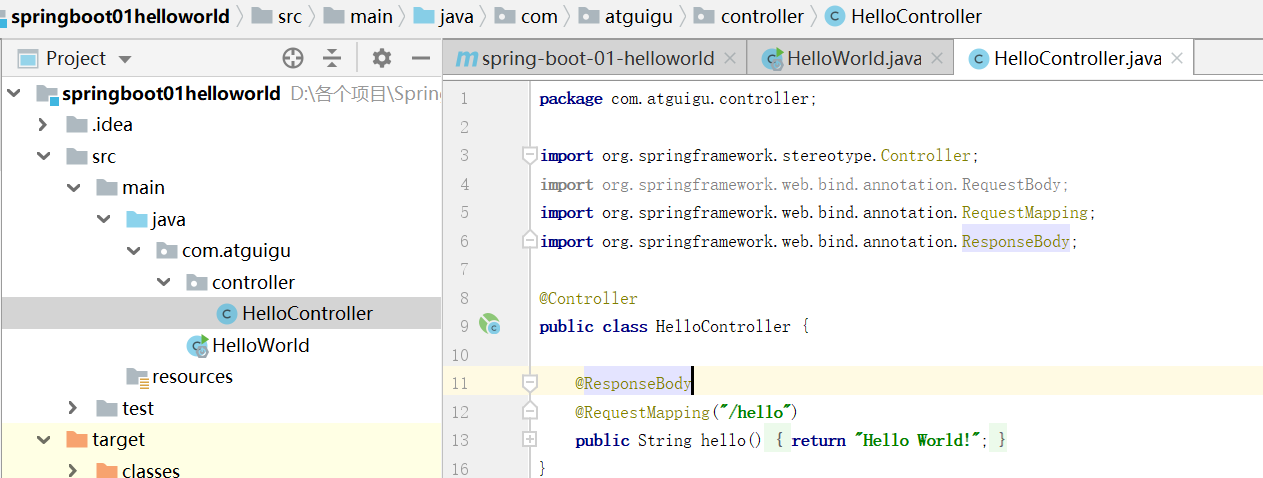
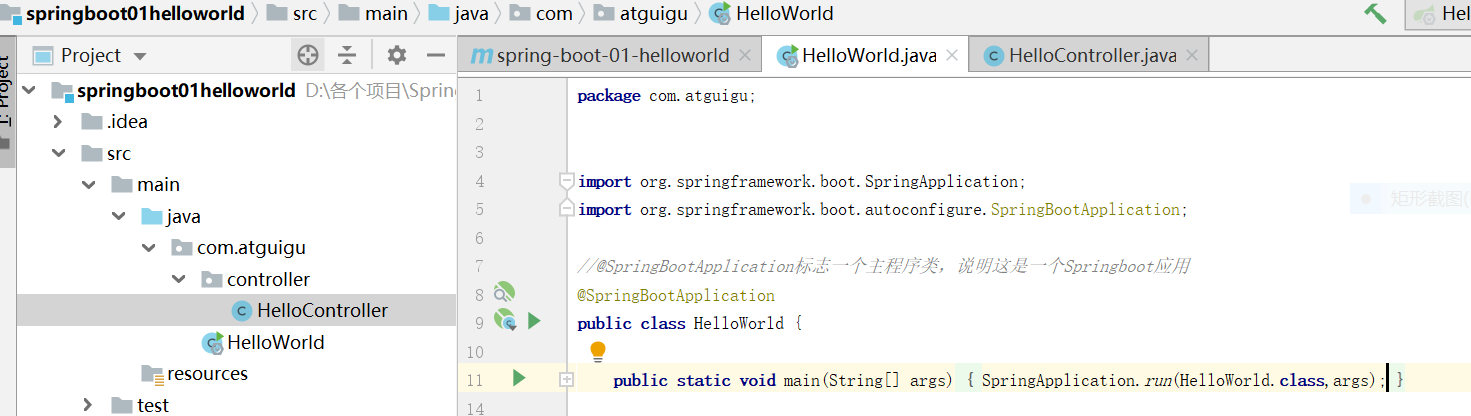
4、创建Java类,如图所示代码,后在浏览器输入http://localhost:8080/hello即可看到Hello World!
5、停止运行程序后打包成jar包在cmd命令行运行程序
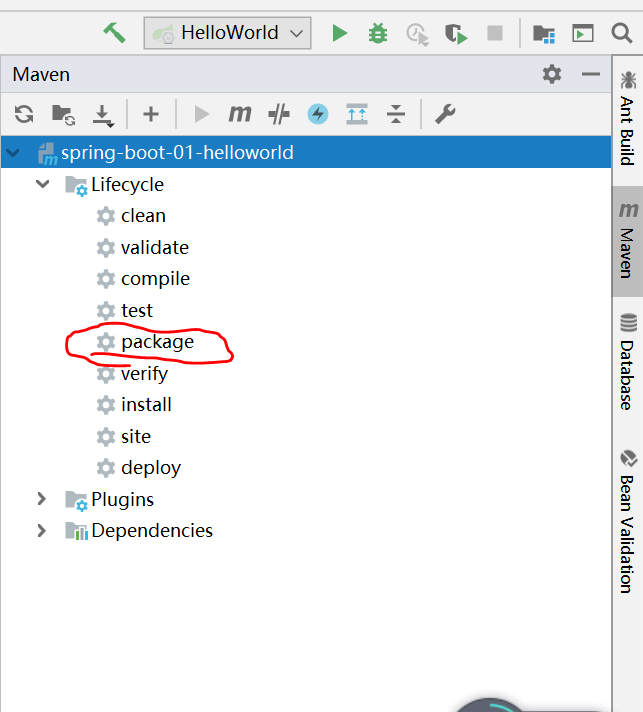
点击package即可将命令打包,打包完成可见
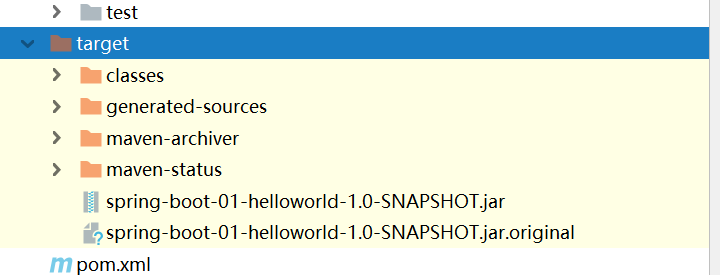
将包复制到桌面,cmd进入桌面后输入:Java -jar 包名
即可运行此程序,这就是将程序打包成jar包,刷新上一步链接依旧可以看到Hello World!
Springboot第一个程序总结
1、Springboot程序启动不需要配置Tomcat环境;
2、spring-boot-starter:spring-boot场景启动器;帮我们导入了web模块正常运行所依赖的组件;
Spring Boot将所有的功能场景都抽取出来,做成一个个的starters(启动器),只需要在项目里面引入这些starter相关场景的所有依赖都会导入进来。要用什么功能就导入什么场景的启动器。
3、@SpringBootApplication: Spring Boot应用标注在某个类上说明这个类是SpringBoot的主配置类,SpringBoot就应该运行这个类的main方法来启动SpringBoot应用;
4、@SpringBootConfiguration:Spring Boot的配置类;标注在某个类上,表示这是一个Spring Boot的配置类;
@Configuration:配置类上来标注这个注解;配置类 —– 配置文件;配置类也是容器中的一个组件;@Component
5、@EnableAutoConfiguration:开启自动配置功能; 以前我们需要配置的东西,Spring Boot帮我们自动配置;@EnableAutoConfiguration告诉SpringBoot开启自动配置功能;这样自动配置才能生效;
6、@AutoConfigurationPackage:自动配置包
@Import(AutoConfigurationPackages.Registrar.class):
Spring的底层注解@Import,给容器中导入一个组件;导入的组件由AutoConfigurationPackages.Registrar.class;
将主配置类(@SpringBootApplication标注的类)的所在包及下面所有子包里面的所有组件扫描到Spring容器;
7、EnableAutoConfigurationImportSelector:导入哪些组件的选择器;将所有需要导入的组件以全类名的方式返回;这些组件就会被添加到容器中;给容器中导入非常多的自动配置类(xxxAutoConfiguration);就是给容器中导入这个场景需要的所有组件,并配置好这些组件;有了自动配置类,免去了我们手动编写配置注入功能组件等的工作;
8、Spring Boot在启动的时候从类路径下的META-INF/spring.factories中获取EnableAutoConfiguration指定的值,将这些值作为自动配置类导入到容器中,自动配置类就生效,帮我们进行自动配置工作;==以前我们需要自己配置的东西,自动配置类都帮我们;J2EE的整体整合解决方案和自动配置都在spring-boot-autoconfigure-1.5.9.RELEASE.jar。
使用Spring Initializer快速创建Spring Boot项目
使用 Spring Initializer快速创建项目:IDE都支持使用Spring的项目创建向导快速创建一个Spring Boot项目;选择我们需要的模块;向导会联网创建Spring Boot项目;默认生成的Spring Boot项目;
- 主程序已经生成好了,我们只需要我们自己的逻辑
   - resources文件夹中目录结构
   - static:保存所有的静态资源; js css  images;
   - templates:保存所有的模板页面;(Spring Boot默认jar包使用嵌入式的Tomcat,默认不支持JSP页面);可以使用模板引擎(freemarker、thymeleaf);
   - application.properties:Spring Boot应用的配置文件;可以修改一些默认设置;
yaml
以前的配置文件;大多都使用的是 xxxx.xml文件;
YAML:以数据为中心,比json、xml等更适合做配置文件;
yaml:配置例子
server:
port: 8081
XML:
<server>
<port>8081</port>
</server>
yaml基本语法
1、基本语法
k:(空格)v:表示一对键值对(空格必须有);
以**空格**的缩进来控制层级关系;只要是左对齐的一列数据,都是同一个层级的;属性和值也是大小写敏感
server:
    port: 8081
    path: /hello
2、值的写法
字面量:普通的值(数字,字符串,布尔)
k: v:字面直接来写;
字符串默认不用加上单引号或者双引号;
"":双引号;不会转义字符串里面的特殊字符;特殊字符会作为本身想表示的意思
name: "zhangsan \n lisi":输出;zhangsan 换行 lisi
'':单引号;会转义特殊字符,特殊字符最终只是一个普通的字符串数据
name: ‘zhangsan \n lisi’:输出;zhangsan \n lisi
对象、Map(属性和值)(键值对):
k: v:在下一行来写对象的属性和值的关系;注意缩进
对象还是k: v的方式
friends:
lastName: zhangsan
age: 20
行内写法:friends: {lastName: zhangsan,age: 18}
数组(List、Set):
用- 值表示数组中的一个元素:
pets:
 - cat
 - dog
 - pig
行内写法:pets: [cat,dog,pig]
配置文件值注入
配置文件
person:
    lastName: hello
    age: 18
    boss: false
    birth: 2017/12/12
    maps: {k1: v1,k2: 12}
    lists:
      - lisi
      - zhaoliu
    dog:
      name: 小狗
      age: 12

  javabean类下加@ConfigurationProperties(prefix = "person")的时候会有提示则在pom.xml加依赖:
  <!--导入配置文件处理器,配置文件进行绑定就会有提示-->
        <dependency>
            <groupId>org.springframework.boot</groupId>
            <artifactId>spring-boot-configuration-processor</artifactId>
            <optional>true</optional>
        </dependency>
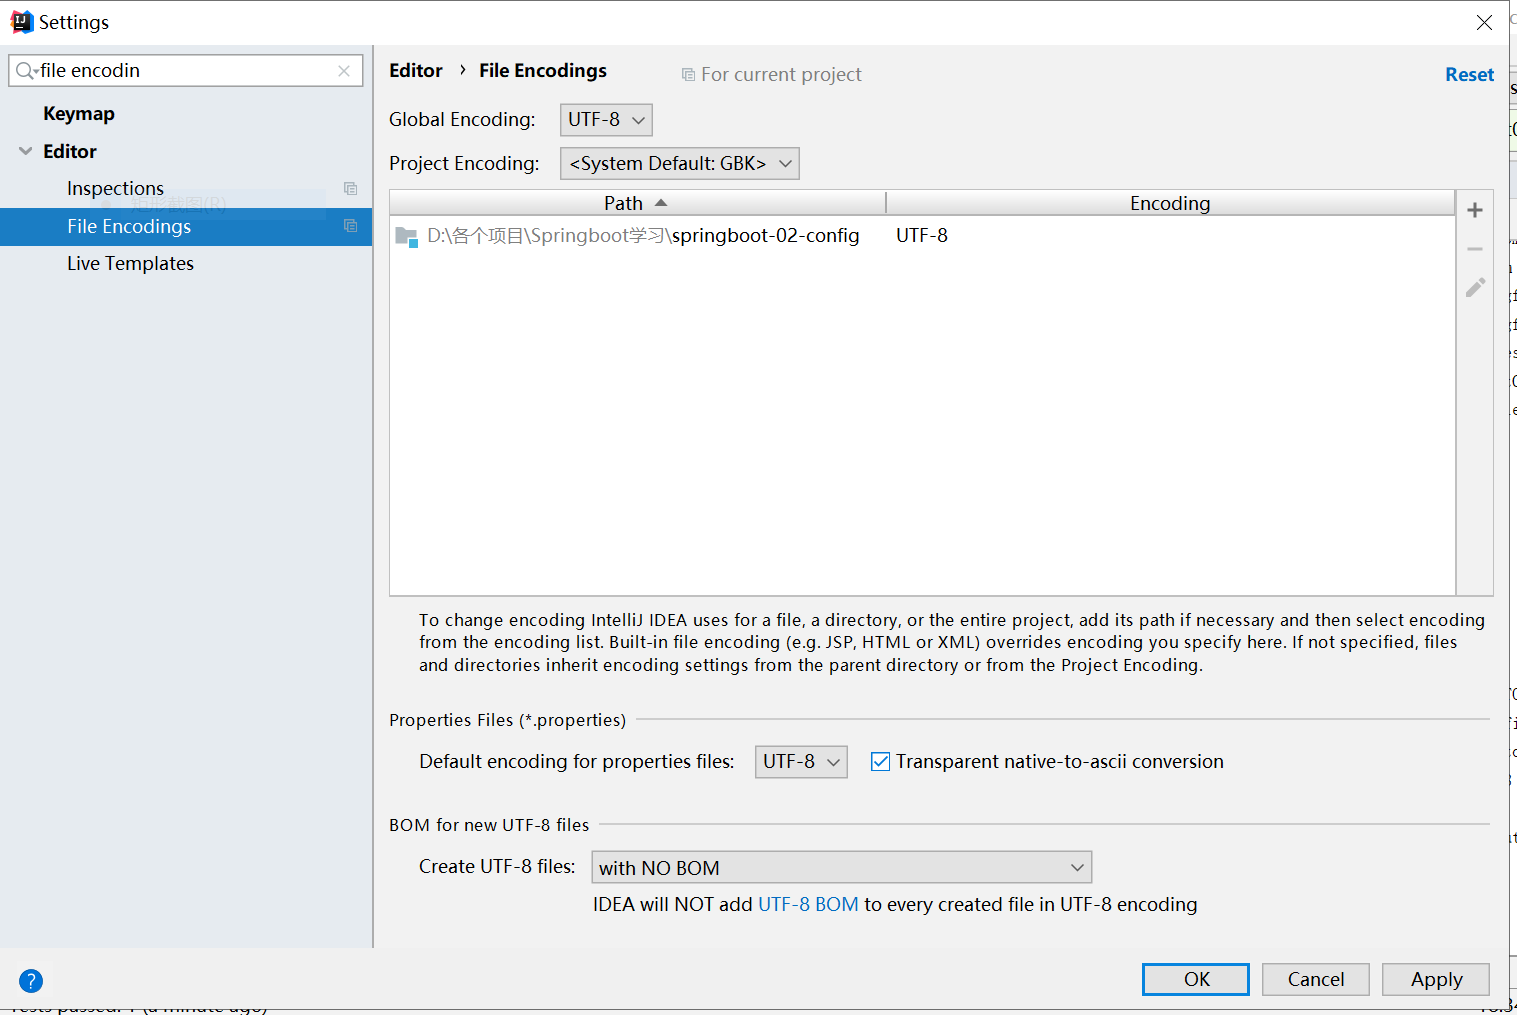
中文乱码情况
如图设置即可解决
web开发
1、简介
使用SpringBoot;
1)、创建SpringBoot应用,选中我们需要的模块;**
2)、SpringBoot已经默认将这些场景配置好了,只需要在配置文件中指定少量配置就可以运行起来**
3)、自己编写业务代码;

自动配置原理:
这个场景SpringBoot帮我们配置了什么?能不能修改?能修改哪些配置?能不能扩展?xxx
xxxxAutoConfiguration:帮我们给容器中自动配置组件;
xxxxProperties:配置类来封装配置文件的内容;

访问当前项目的任何资源,都去(静态资源的文件夹)找映射:
"classpath:/META-INF/resources/",
"classpath:/resources/",
"classpath:/static/",
"classpath:/public/"
"/":当前项目的根路径
2、Thymeleaf使用
引入thymeleaf;
<dependency>
<groupId>org.springframework.boot</groupId>
<artifactId>spring-boot-starter-thymeleaf</artifactId>
2.1.6
</dependency>
切换thymeleaf版本
<properties>
<thymeleaf.version>3.0.9.RELEASE</thymeleaf.version>
<!-- 布局功能的支持程序 thymeleaf3主程序 layout2以上版本 -->
<!-- thymeleaf2 layout1-->
<thymeleaf-layout-dialect.version>2.2.2</thymeleaf-layout-dialect.version>
</properties>
使用:
@ConfigurationProperties(prefix = "spring.thymeleaf")
public class ThymeleafProperties {
private static final Charset DEFAULT_ENCODING = Charset.forName("UTF-8");
private static final MimeType DEFAULT_CONTENT_TYPE = MimeType.valueOf("text/html");
public static final String DEFAULT_PREFIX = "classpath:/templates/";
public static final String DEFAULT_SUFFIX = ".html";
只要我们把HTML页面放在classpath:/templates/,thymeleaf就能自动渲染;
使用:
1、导入thymeleaf的名称空间
<html lang="en" xmlns:th="http://www.thymeleaf.org">
2、使用thymeleaf语法;
<!DOCTYPE html>
<html lang="en" xmlns:th="http://www.thymeleaf.org">
<head>
<meta charset="UTF-8">
<title>Title</title>
</head>
<body>
<h1>成功!</h1>
<!--th:text 将div里面的文本内容设置为 -->
<div th:text="${hello}">这是显示欢迎信息</div>
</body>
</html>
3、语法规则
th:text;改变当前元素里面的文本内容;
th:任意html属性;来替换原生属性的值
自定义starter
starter:
1、这个场景需要使用到的依赖是什么?
2、如何编写自动配置
@Configuration //指定这个类是一个配置类
@ConditionalOnXXX //在指定条件成立的情况下自动配置类生效
@AutoConfigureAfter //指定自动配置类的顺序
@Bean //给容器中添加组件
@ConfigurationPropertie结合相关xxxProperties类来绑定相关的配置
@EnableConfigurationProperties //让xxxProperties生效加入到容器中
自动配置类要能加载
将需要启动就加载的自动配置类,配置在META-INF/spring.factories
org.springframework.boot.autoconfigure.EnableAutoConfiguration=\
org.springframework.boot.autoconfigure.admin.SpringApplicationAdminJmxAutoConfiguration,\
org.springframework.boot.autoconfigure.aop.AopAutoConfiguration,\
3、模式:
启动器只用来做依赖导入;
专门来写一个自动配置模块;
启动器依赖自动配置;别人只需要引入启动器(starter)
mybatis-spring-boot-starter;自定义启动器名-spring-boot-starter
步骤:
1)、启动器模块
<?xml version="1.0" encoding="UTF-8"?>
<project xmlns="http://maven.apache.org/POM/4.0.0"
xmlns:xsi="http://www.w3.org/2001/XMLSchema-instance"
xsi:schemaLocation="http://maven.apache.org/POM/4.0.0 http://maven.apache.org/xsd/maven-4.0.0.xsd">
<modelVersion>4.0.0</modelVersion>
<groupId>com.atguigu.starter</groupId>
<artifactId>atguigu-spring-boot-starter</artifactId>
<version>1.0-SNAPSHOT</version>
<!--启动器-->
<dependencies>
<!--引入自动配置模块-->
<dependency>
<groupId>com.atguigu.starter</groupId>
<artifactId>atguigu-spring-boot-starter-autoconfigurer</artifactId>
<version>0.0.1-SNAPSHOT</version>
</dependency>
</dependencies>
</project>
2)、自动配置模块
<?xml version="1.0" encoding="UTF-8"?>
<project xmlns="http://maven.apache.org/POM/4.0.0" xmlns:xsi="http://www.w3.org/2001/XMLSchema-instance"
xsi:schemaLocation="http://maven.apache.org/POM/4.0.0 http://maven.apache.org/xsd/maven-4.0.0.xsd">
<modelVersion>4.0.0</modelVersion>
<groupId>com.atguigu.starter</groupId>
<artifactId>atguigu-spring-boot-starter-autoconfigurer</artifactId>
<version>0.0.1-SNAPSHOT</version>
<packaging>jar</packaging>
<name>atguigu-spring-boot-starter-autoconfigurer</name>
<description>Demo project for Spring Boot</description>
<parent>
<groupId>org.springframework.boot</groupId>
<artifactId>spring-boot-starter-parent</artifactId>
<version>1.5.10.RELEASE</version>
<relativePath/> <!-- lookup parent from repository -->
</parent>
<properties>
<project.build.sourceEncoding>UTF-8</project.build.sourceEncoding>
<project.reporting.outputEncoding>UTF-8</project.reporting.outputEncoding>
<java.version>1.8</java.version>
</properties>
<dependencies>
<!--引入spring-boot-starter;所有starter的基本配置-->
<dependency>
<groupId>org.springframework.boot</groupId>
<artifactId>spring-boot-starter</artifactId>
</dependency>
</dependencies>
</project>
package com.atguigu.starter;
import org.springframework.boot.context.properties.ConfigurationProperties;
@ConfigurationProperties(prefix = "atguigu.hello")
public class HelloProperties {
private String prefix;
private String suffix;
public String getPrefix() {
return prefix;
}
public void setPrefix(String prefix) {
this.prefix = prefix;
}
public String getSuffix() {
return suffix;
}
public void setSuffix(String suffix) {
this.suffix = suffix;
}
}
package com.atguigu.starter;
public class HelloService {
HelloProperties helloProperties;
public HelloProperties getHelloProperties() {
return helloProperties;
}
public void setHelloProperties(HelloProperties helloProperties) {
this.helloProperties = helloProperties;
}
public String sayHellAtguigu(String name){
return helloProperties.getPrefix()+"-" +name + helloProperties.getSuffix();
}
}
package com.atguigu.starter;
import org.springframework.beans.factory.annotation.Autowired;
import org.springframework.boot.autoconfigure.condition.ConditionalOnWebApplication;
import org.springframework.boot.context.properties.EnableConfigurationProperties;
import org.springframework.context.annotation.Bean;
import org.springframework.context.annotation.Configuration;
@Configuration
@ConditionalOnWebApplication //web应用才生效
@EnableConfigurationProperties(HelloProperties.class)
public class HelloServiceAutoConfiguration {
@Autowired
HelloProperties helloProperties;
@Bean
public HelloService helloService(){
HelloService service = new HelloService();
service.setHelloProperties(helloProperties);
return service;
}
}
更多SpringBoot整合示例
https://github.com/spring-projects/spring-boot/tree/master/spring-boot-samples